How It Works... After You Order
"Cleaning Greenware to Fired Bisque"
|
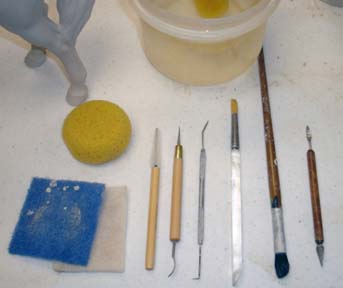
These are the tools I use to clean greenware.
|
|
|
|
|
|
When your greenware pieces are dry, but still very fragile, the cleaning process
starts.
|
|
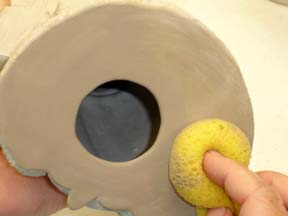
I first start with smoothing out the bottom of the piece. I cut away excess dried
clay and any roughness with a "Scraping Tool". I then use a damp sponge to smooth
out the edges.
|
|
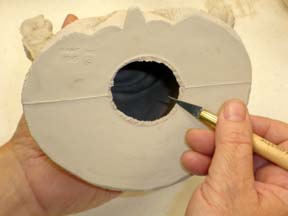
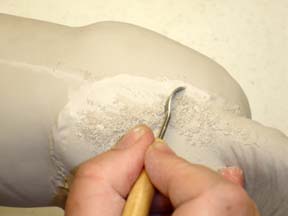
There are raised ridges where the seams of the mold come together. With the "Scraping
Tool" these seams are removed and smoothed out with a damp sponge or scrubby pad.
The piece is then checked for imperfections and smoothed out or detail put back
in, depending on which is needed.
|
|
|
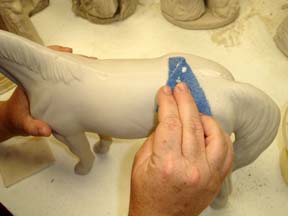
Remember the attachments? They also have ridges of dried unwanted excess slip that
has to be removed. They are removed with the cleaning tool and then smoothed out
with a sponge or soft wet brush.
|
|
If a piece is accidently broken in this stage, which doesn't happen often, the whole
piece is discarded and made over again from scratch. You can repair Greenware, but
it leaves the piece weak in that spot and may break or crack when in the final stages
of being fired. We do not want THAT to happen!
|
Cleaning is one of the most important parts of a good bisque piece! If the ridges
and detail are not paid attention to and cleaned right, no matter how wonderful
it is painted, the piece will look bad. I take special care in cleaning and making
sure each piece would be something that I would be proud to own myself. My customers
know that when they recieve a cleaned bisque piece from our shop, each one has been
checked and rechecked for perfection. This process takes the most time, but when
my customers unpack their pieces, they are amazed at the high quality of workmanship!
After the cleaning process, the pieces are ready to be fired in the kiln! Each greenware
piece is placed carefully in the kiln with enough space around them for even firing.
A "Firing Cone" is put in the kiln and is used to reach the desired tempeture. When
the temperture reaches over 1200 degrees, the cone will bend and shut the kiln off
automatically.
The kiln has to be vented for the first hour of firing. Then the next stage is for
the lid to be closed and fired on low tempeture for another hour. The third stage
is medium heat for the next hour. Then the kiln is turned on high and when it reaches
the desired fired cone of 04 it bends and shuts itself off.
The whole process of firing takes about 6 hours, but the kiln can not be opened
for another 12 hours after it has been turned off. The cooling time for the kiln
is very important! If the kiln is opened too soon, the pieces will still be very
hot and they may crack from cold air hitting them. They MUST be fired slowly and
COOLED slowly! I normally fire up the kiln in the evening and leaving it to cool
all night long. I then can remove the pieces in the late morning the next day.
We have three kilns in different sizes. Sometimes all three are running at the same
time!